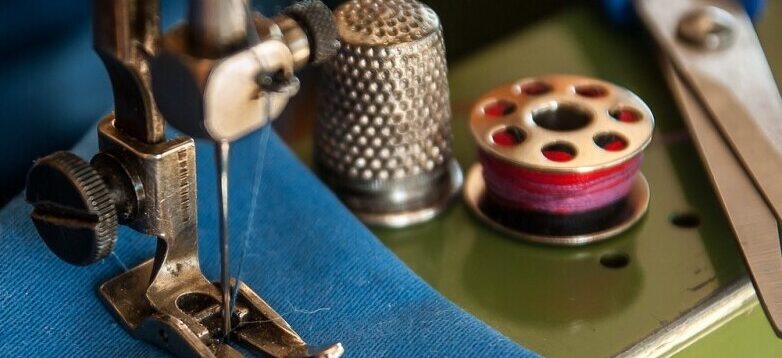

Kicking off your sewing journey with the right tools makes everything smoother. Got a needle and thread? You’re already halfway there, but let’s add a few more essential sewing tools revery beginner needs for your toolbox.
Needles are your new best friends. From hand-sewing needles for those delicate stitch-ups to machine needles tackling everything tough, they’re indispensable. Let’s talk about machine needles first. A common mistake is Using the wrong type of sewing machine needle. Using the wrong needle can lead to poor stitch quality. If you’re sewing on a heavier fabric with the wrong needle it can lead to the needle breaking as well the wrong needle will probably cause difficulty working with your fabric.
One important thing to know about buying sewing machine needles is that they are standardized and will fit all home sewing machines, old and new.
There are many different size and styles of needles each for a specific job.
Needle Styles and Sizes
The most commonly used needles are universal needles that come in different sizes. The smaller sizes are for finer fabrics and the higher the needle size the heavier the fabric should be. A size 70 or 10, is for fine fabrics like fine cottons, silks, size 80 or 12 are for medium to light fabrics like shirtings, sizes 90 or 14 is for medium to heavy fabrics, like corduroys. for heavy weight fabrics like upholstery use a size 90 or 16. Needles sized at 100 or 18 are good for extra heavy upholstery.
Ball Point Needles-good for knits and sizes come in 70 or 10 through size 90 or 14. The finer the knit like tricot will use the size 70 or 10. Size 90 or 14 is good for medium hand knits like interlock. Size 90 or 14 is for heavy knits like double knits.
Stretch Needles-These needles are similar to a ball point needle but rounder and slips into the cloth avoiding skipped stitches or holes and are good for sewing on lycra, spandex, sportswear and lingerie.
Sharps-If you’re sewing on fine fabrics like fine silks or cotton voile sharps are your best bet and I suggest size 70 or 10. Size 80 or 12 can work on shirtings. Sharps are also wonderful when topstitching and I recommend 90 or 14.
If you’re sewing on jeans, upholstery, vinyl, you might look into jean needles. For sewing on leathers and suedes you’ll need to use leather needles. Both of these needles come in two sizes 90 or 16 and 100 or 18.
Thread may seem like a no-brainer, but quality counts! A good spool of polyester thread is a solid choice for beginners. It’s versatile, strong, and friendly on most fabrics. And hey, start with some basic colors – black, white, and maybe a fun red or blue!
Scissors, yes, but not the ones from the junk drawer! Spring for a pair of sharp fabric shears. These beauties ensure clean cuts. And remember, they’re for fabric only. This rule makes or breaks perfect seams.
Don’t overlook measuring tools, like a trusty tape measure. You’ll want one with both inches and centimeters. Plus, those hard yardsticks are great for straight-edge needs and double up as pointy things-hider.
Let’s talk stitch rippers. Mistakes happen, and ripper tools let you fix without a fuss. Grip them right, and snip away your woes with a bit of finesse.
And for a final touch to your starter kit, choose some marking tools. Tailor’s chalk, pencils, or disappearing ink pens let you sketch your creation onto fabric without commitment. It’s like fabric graffiti you can live with or erase as needed!
Building Your Sewing Toolkit: Must-Have Advanced Tools
When you’re ready to step up from the basics, it’s time to think about some advanced tools that can really level up your sewing game.
A sewing machine is probably the first big upgrade. Choosing one might feel like picking a new car, but it doesn’t have to be daunting. You want something user-friendly with features like different stitch options and an automatic threader to save you from squint mode.
Rotary cutters and cutting mats are next on the list. They’re the secret to precision cuts, perfect for quilting or when you need consistently neat edges. Just remember to change the blades when they get dull for that smooth slice every time.
Pressing tools aren’t just for perfectionists. Good old ironing boards and irons are must-haves, but expanding your kit with a pressing cloth or even a tailor’s ham (yep, that’s a thing) can make seams lie flatter and garments look crisp.
Explore pinning and clipping gadgets like straight pins, safety pins, or nifty fabric clips. These tools keep your fabric layers aligned, which is a real game-changer for sewing without mishaps.
Upgrading your toolkit isn’t just about having fancy equipment—it’s about enhancing your sewing efficiency and accuracy with the right tools at the right time.
Creating a Seamless Experience: Organizing and Maintaining Your Sewing Tools
You’ve got the tools—now let’s keep them in tip-top shape and out of chaos. Smart storage solutions are your first line of defense against losing those critical tools. Invest in a tool caddy, or even a tackle box, where every needle and bobbin gets its own home. It’s all about making sure you can find what you need when you need it.
Cleaning and maintaining your tools is a small effort that pays off big time. Keep those scissors sharp with a soft fabric to prevent rust, and don’t forget to oil your sewing machine according to the manual—that thing is a workhorse that deserves a little spa treatment.
Safety’s a big deal, especially when wielding sharp blades. Always cap your rotary cutters and give pins a designated bin. It keeps everything in place and your fingers intact.
Tools aren’t forever—sometimes you gotta let go and upgrade. If something’s dragging its feet, like a dull blade or brittle tape measure, it might be time to replace it. That way, every project feels like a breeze.
By organizing and maintaining your sewing arsenal, you’re not just prolonging their life; you’re fostering a creative, stress-free space that lets your passion for sewing shine through.
I remember my mom when she was younger, she was a really good dressmaker and seamstress, with clients from kids to grown-ups, even entire families, for that matter.
And for her own family, I had look-alike beautiful Christmas dresses with my younger sister. Down to her grandkids, both boys and girls, she made pants to dresses for them. My son had his baptismal polo and shorts done by his grandma when he was only 3 weeks old. Mama did even curtains for her siblings-in law.
And yes, she had a really good sewing machine, scissors, and all stuff needed for her trade.
She even had this small equipment ( I don’t know the name ) that put holes to belts. And it was a hit then for other dressmakers.
I love your post, brings back happy memories for me.
Marita